Employee Calendar
Every employee set up within BrightPay is provided with their own employee calendar. The purpose of the calendar is to record:
- Annual Leave
- Sick Leave
- Parenting Leave
- Unpaid Leave
- Working Days
- Non-Working Days
- Strike Days
- Attach notes to particular dates
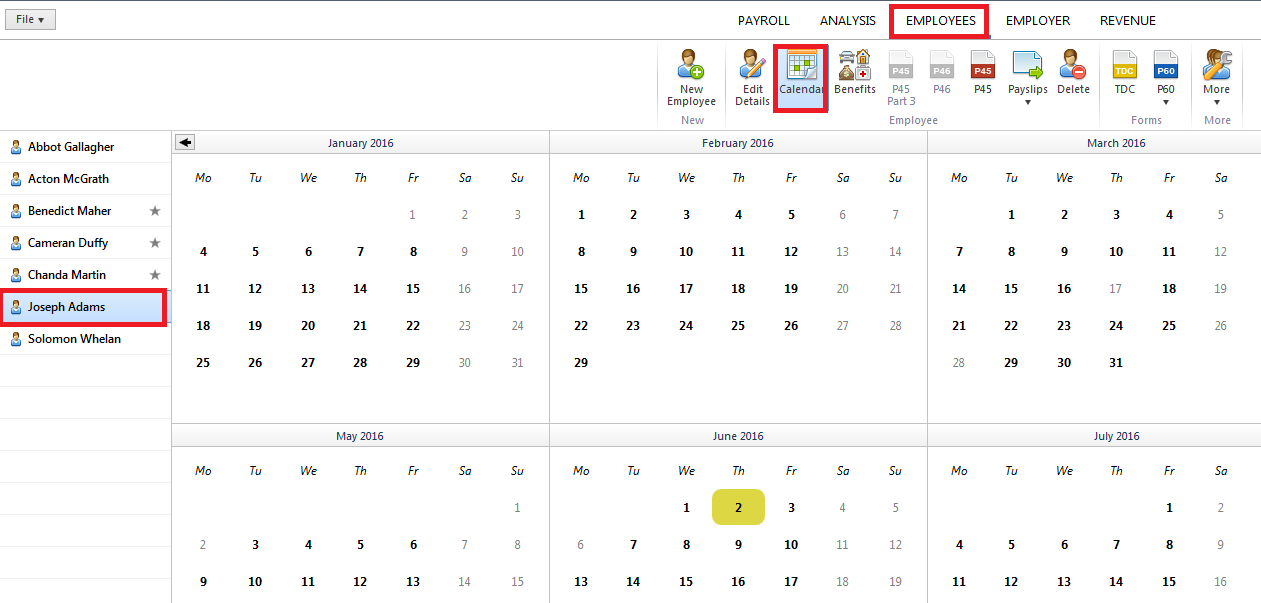
To access an employee’s calendar, click Employees and select the required employee from the listing.
Select Calendar on the menu toolbar to display the employee's calendar on screen:
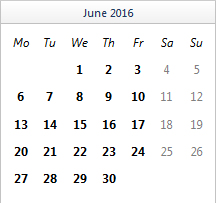
Working Days / Non-Working Days
- Days marked in black are the typical working days for the employee.
- Days marked in grey are the typical non-working days for the employee.
- The typical working days for an employee are set when setting up the employee record. These can be found in the Employment section of the employee record:
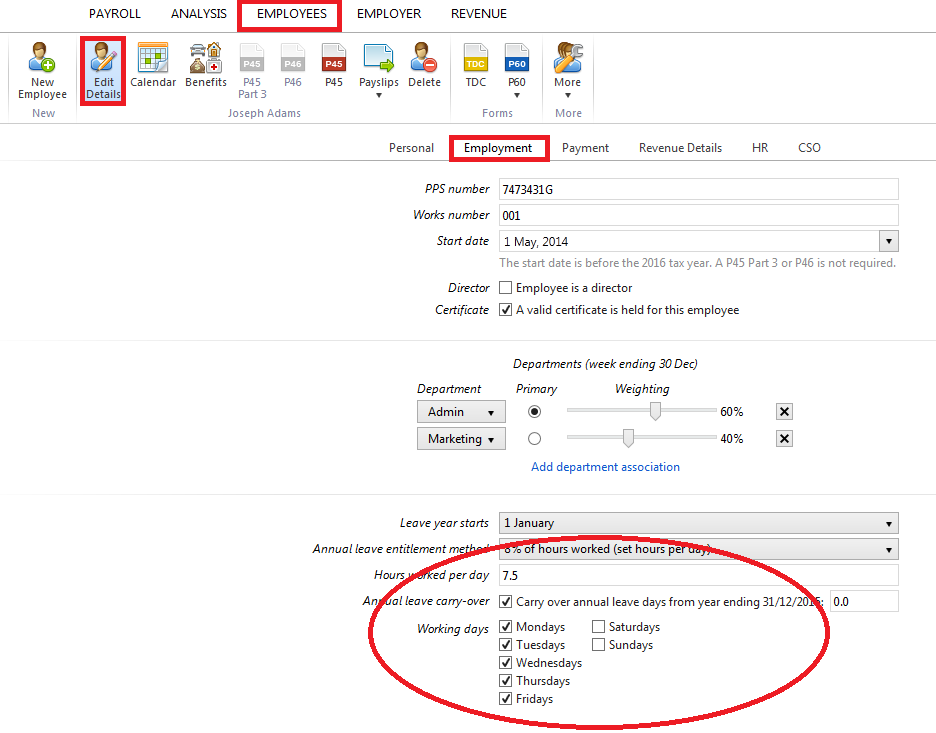
- If the incorrect working days have been flagged in error, simply amend this section and the employee’s calendar will reflect the change.
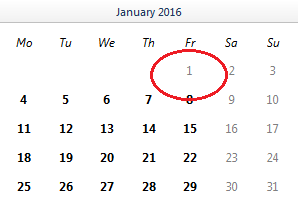
- By default, Public Holidays are flagged as non-working days, for example New Year’s Day:
Change of work days
If a typical non-working day becomes a working day for an employee, as a once-off event, simply record this within the calendar:
- Select the required date on the calendar
- Select Work Day from the listing of leave types offered on the right-hand side of the calendar
The day will change from grey to black to now denote a working day.
Unpaid Leave
To record unpaid leave taken by an employee:
- Select the required date or range of days
- Select Unpaid Leave from the listing of leave types offered on the right side of the calendar
- The selected day/ date range will be flagged in orange which is associated with this leave type
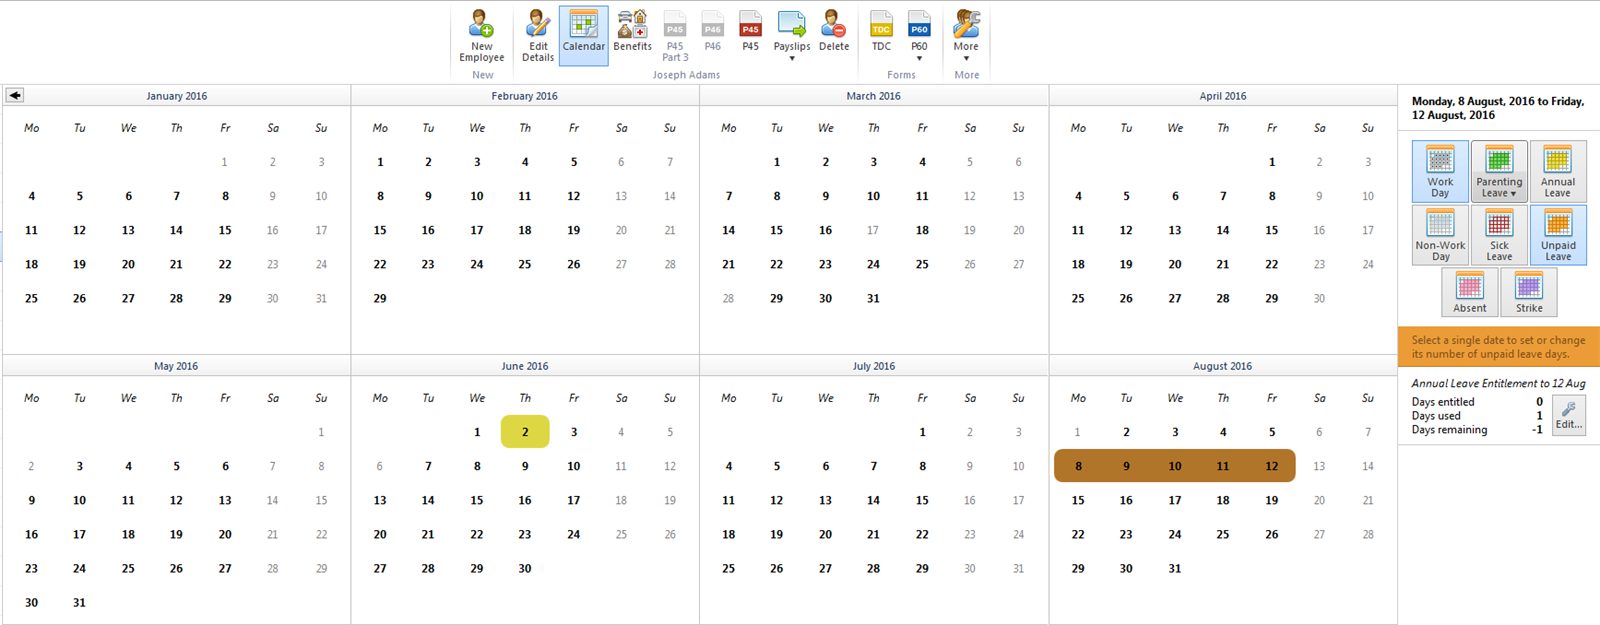
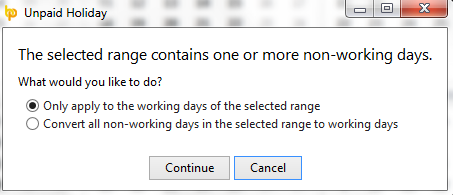
If a selected date range includes typical non-working days, BrightPay will prompt whether or not the typical non-working days should be included and flagged as the same leave type:
Annual Leave
To record annual leave taken by an employee:
- Select the required date or range of days
- Select Annual Leave from the listing of leave types offered on the right side of the calendar
- The selected day/ date range will be flagged in yellow which is associated with this leave type
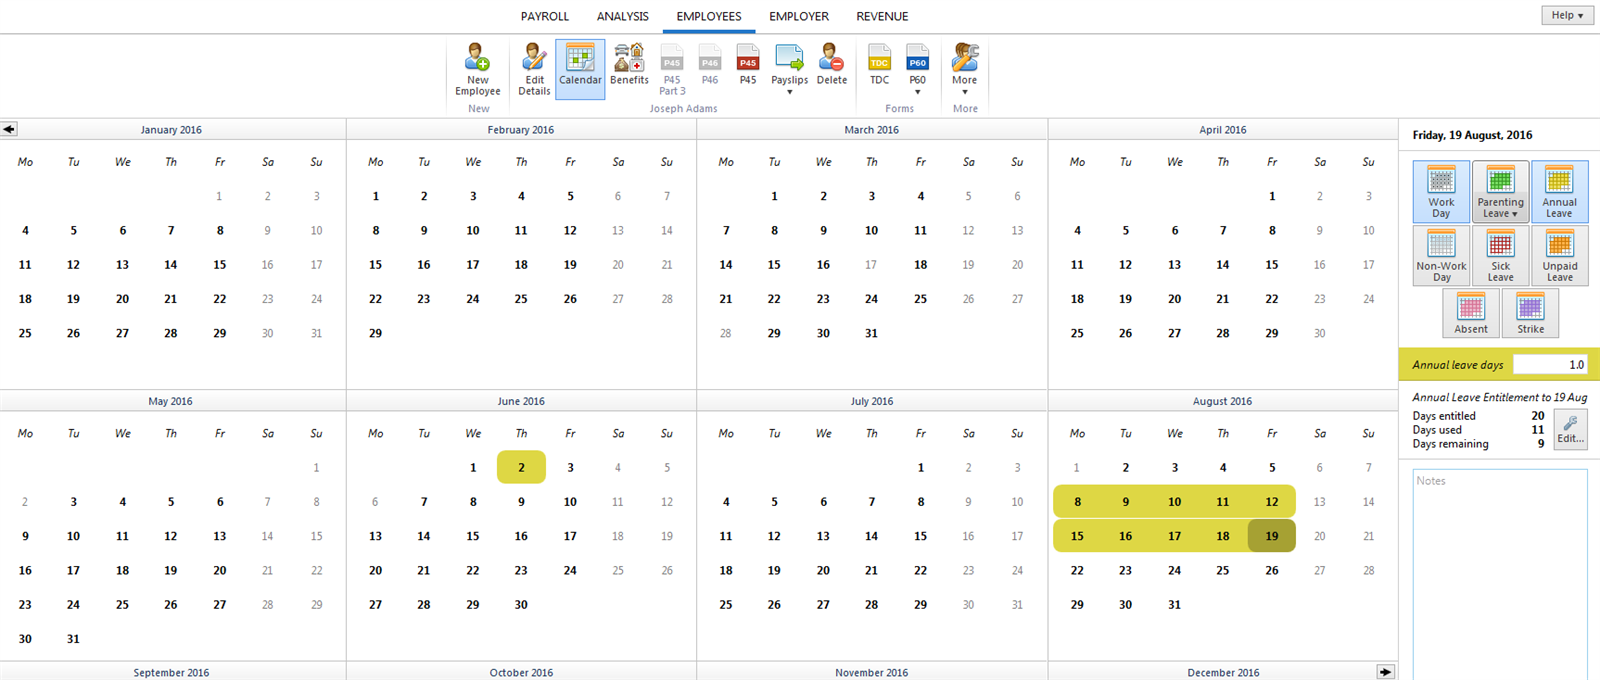
BrightPay will keep a track of an employee's annual leave entitlement based on the annual leave entitlement method chosen for them.
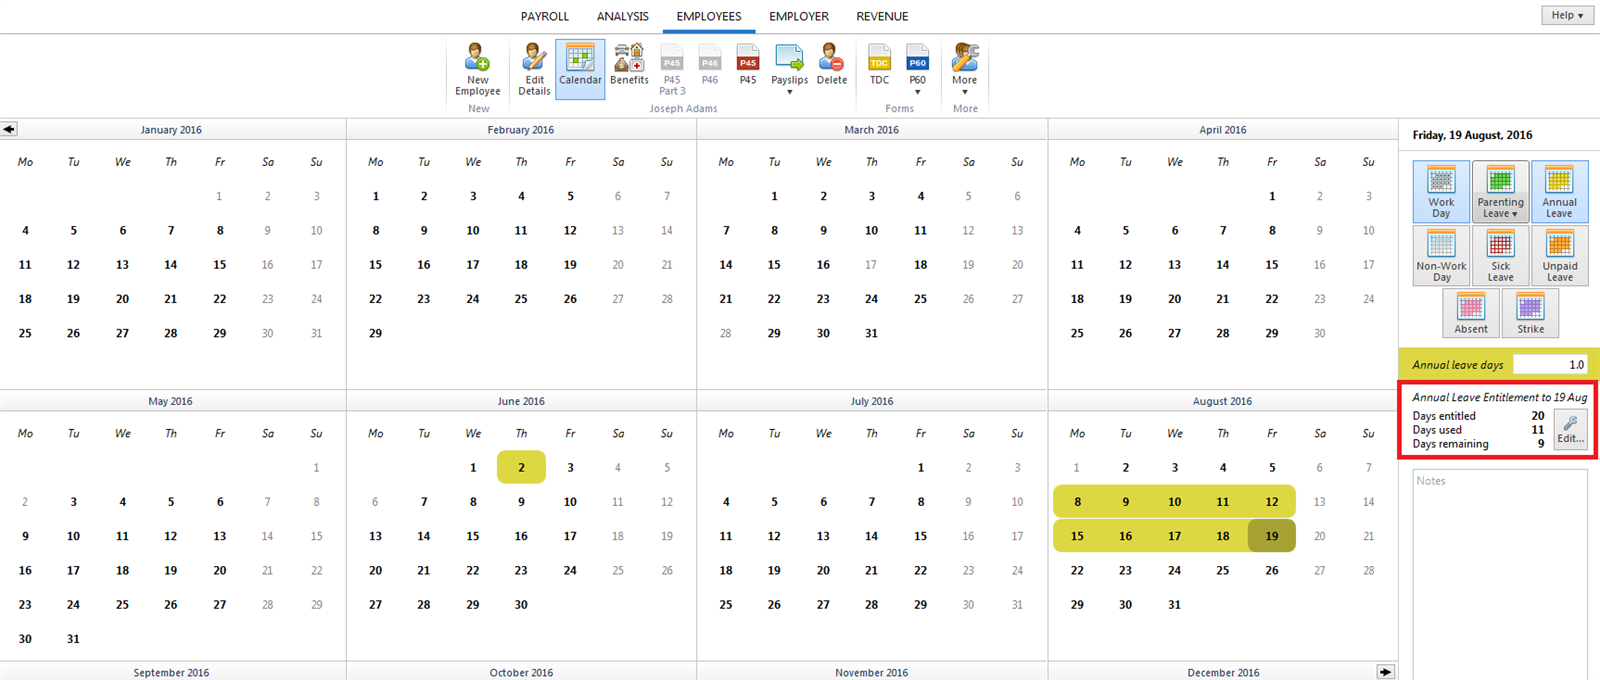
An employee's annual leave entitlement method can be set within the Employment section of their employee record:
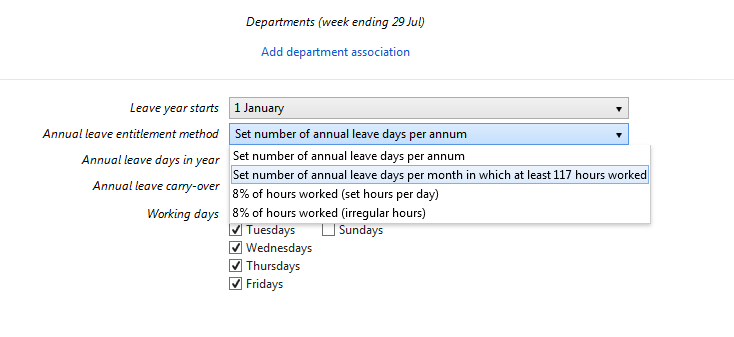
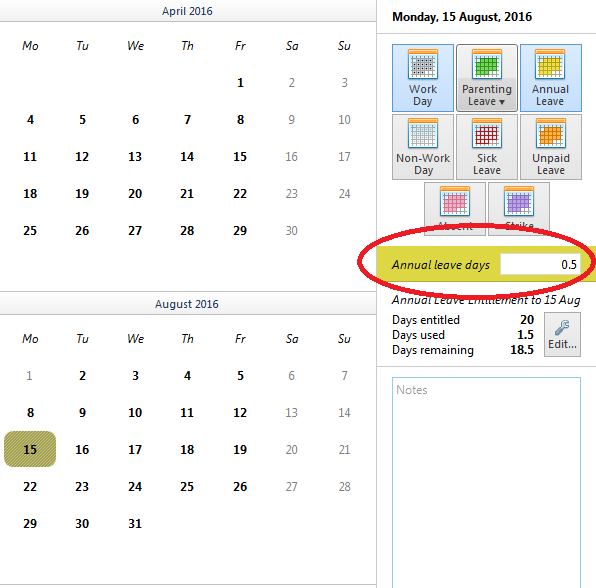
For employees whose annual leave entitlement method is one of the following:
- set number of annual leave days per annum
- set number of annual leave days per month in which at least 117 hours worked
- 8% of hours worked (set hours per day)
part days can be allocated by selecting the applicable date on the calendar and using the dedicated option to the right of the calendar to adjust accordingly.
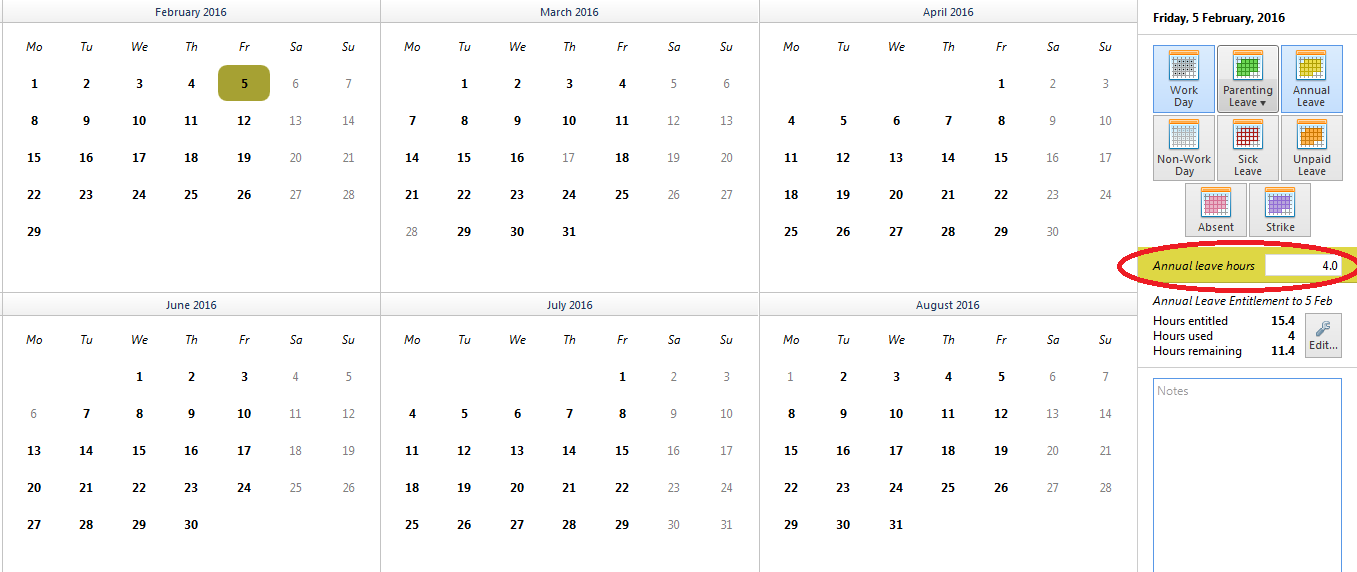
For employees whose annual leave entitlement method is:
- 8% of hours worked (irregular hours)
part hours can be allocated by selecting the applicable date on the calendar and using the dedicated option to the right of the calendar to adjust accordingly.
Adding Notes to Calendar Entries
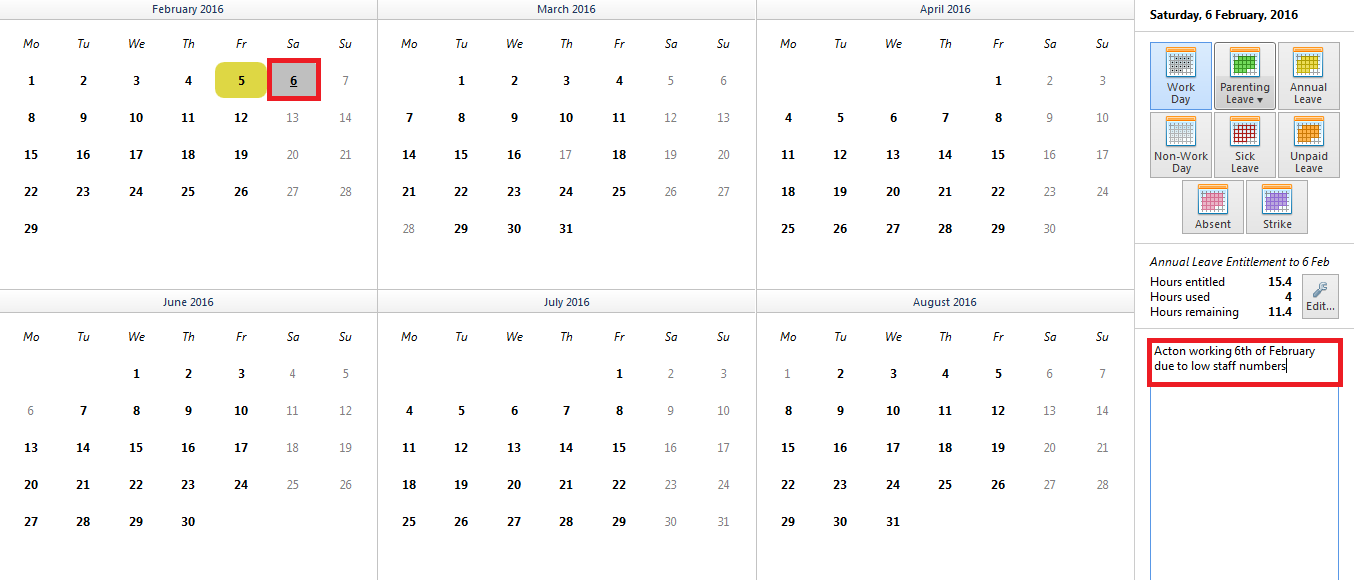
- To add a note to the employee’s calendar, firstly highlight the date on which you would like to add a note. Please note that days in past pay periods are locked and cannot be accessed.
- Enter the note on the right-hand side.
- A date that is underlined denotes that a note has been added for that day. To view a note again, simply click on the relevant date to display the narrative on the right.
 Sick Leave & Parenting Leave
For assistance with recording sick leave and parenting leave on an employee's calendar, please view the relevant help section within our support section.
Printing the Calendar for One or More Employees
To view/print the Calendar for one or more employees, simply select the Employees tab.
- Select an employee from the listing
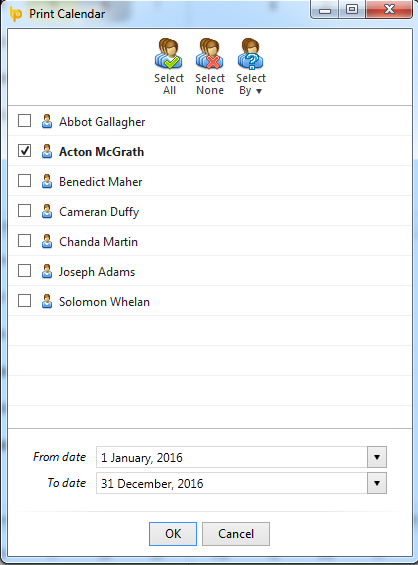
- Click 'More’ on the menu toolbar, followed by ‘Print Calendar for One or More Employees..’

- Simply select the employee(s) whose calendar you wish to view or print and select the ‘date range’ you require.
- Click 'OK' to view your selection on screen.
- To print, click Print on the toolbar
- To export to PDF, click Export on the toolbar
Need help? Support is available at 01 8352074 or brightpayirelandsupport@brightsg.com.
