Employer Portal - Documents
The Documents utility allows users to upload, store and manage key employee and HR related documents securely in BrightPay Connect.
It can be used for example to upload employee documents such as individual contracts of employment, handbooks, appraisal documents, company pension information, company newsletters and disciplinary correspondence. In addition, users may also like to use the document utility to store employee training certificates and qualification records.
All resources that are uploaded can be made available to one or more employees, as required, which employees can then access through their own self-service portal.
Adding a New Resource
1) Within Documents, click the green 'Add' button to add a new resource

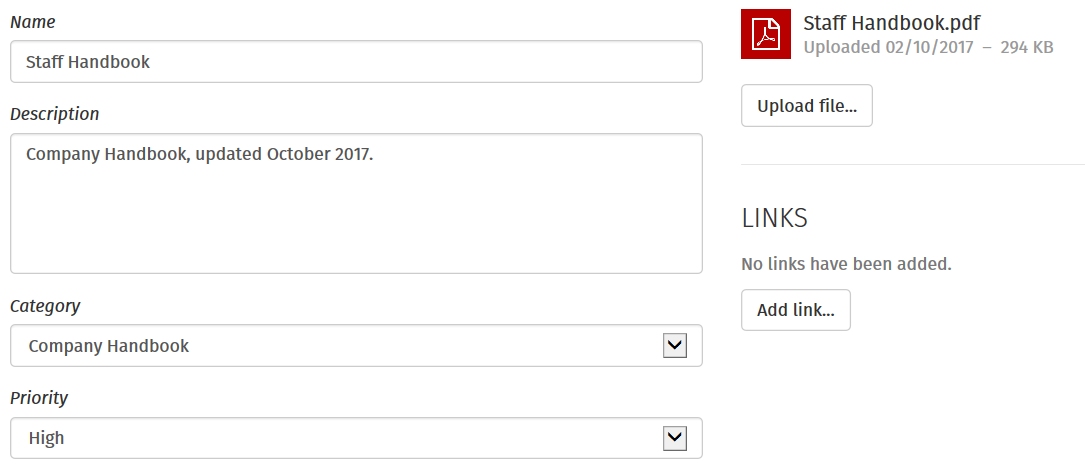
2a) Under Details, enter the name of the resource you wish to upload and a description, if required
b) Select the Category you wish to place the resource under from the drop down menu and choose what Priority it is to have
3a) Under Attachments, click on Upload File and browse to the location of the document you wish to upload into BrightPay Connect
b) Select the file in question and click Open to complete the upload
4a) Alternatively to upload a link (e.g. to a website) under Links, click Add Link.
b) Enter the Label you require and the associated URL. Click OK

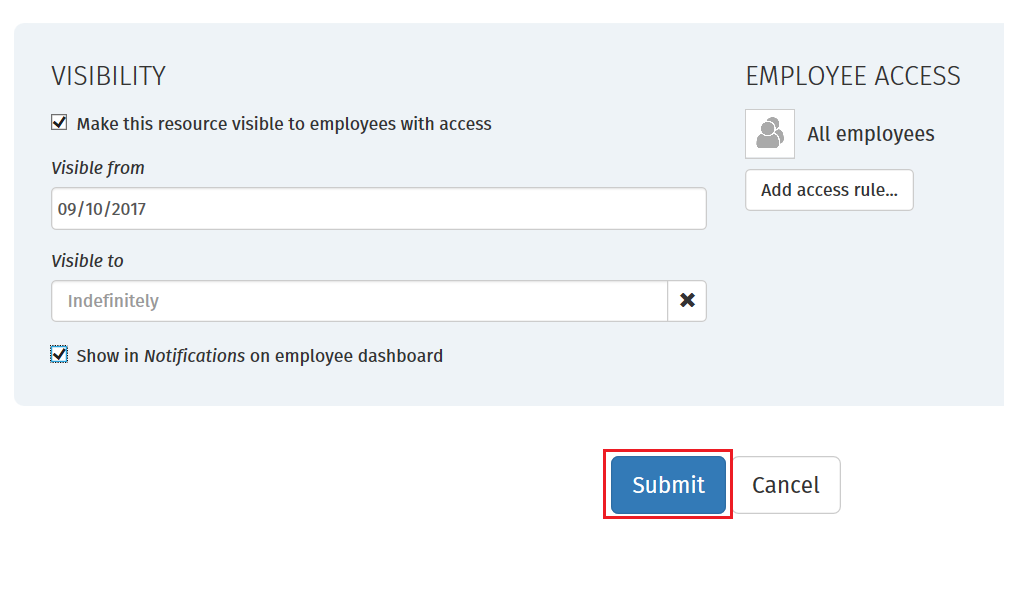
5a) Under Visibility, tick or untick to indicate whether you would like to make this resource visible to employees with access
b) If you wish to make the resource visible, enter the date you wish to make the resource visible from and how long you wish it to be visible for
c) Tick the field provided if you would like to notify the employee(s) of the document upload on their employee dashboard
6a) Under Employee Access, click Add access rule... to grant access to one or more employees.
b) Select the applicable employee, department or 'all employees' option as per your requirements and click Add rule.
c) Click Add access rule... again to grant access to a further employee or department.
7) When ready, click Submit to save your settings

The resource will now be added to the Documents & Resources dashboard, where it can accessed again at any time.

Based on the Visibility and Access Rules that have also been set, the resource will be made available to employees within their self-service portal, if applicable.
Managing a Resource
To manage a resource, simply click on the resource on the Documents & Resources dashboard. To locate a resource, a search facility is provided on the dashboard.
Editing a Resource
To edit the resource, amend as required within the Edit Details screen and click Save Changes
Deleting a Resource
To delete a resource, click 'delete resource' at the bottom of the Edit Details screen. Click Yes to delete the resource.
Sending Notifications
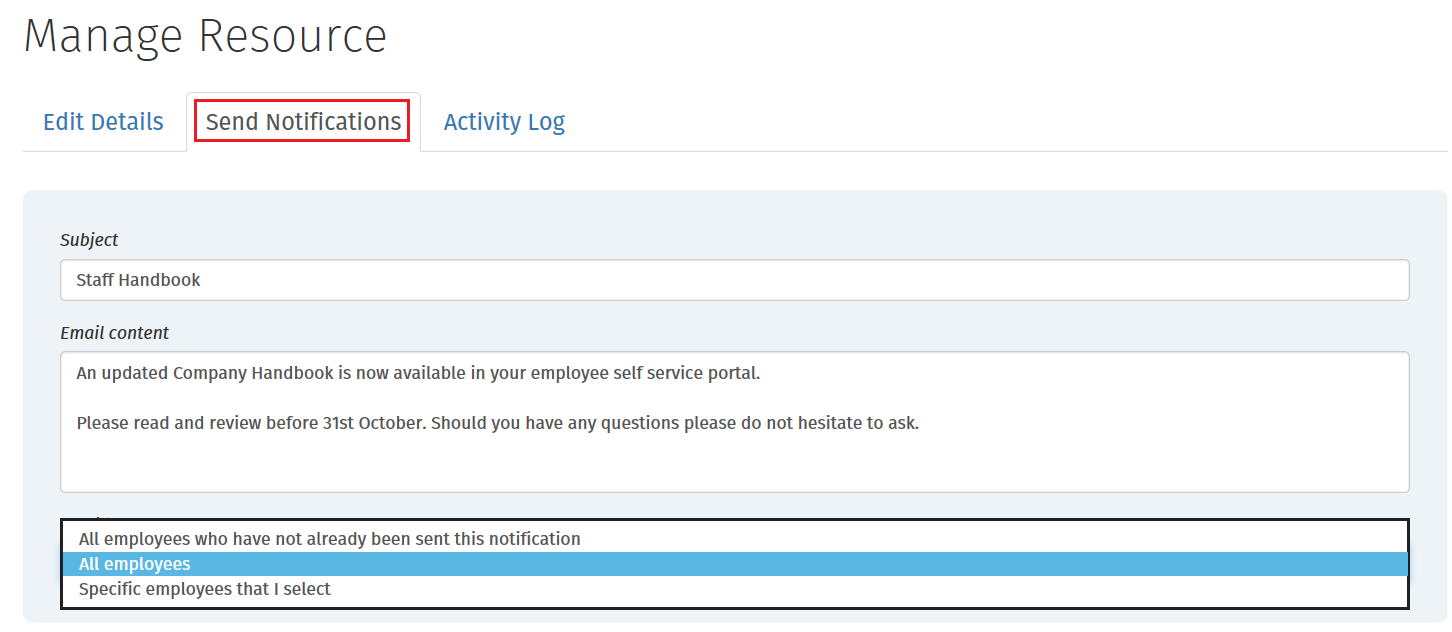
Should you wish to notify employees by email of a new document upload, select Send Notifications
- Enter the Subject of your email in the field provided
- Enter your Email content
- Select who you would like to send the notification to using the drop down menu
- Click Send when ready

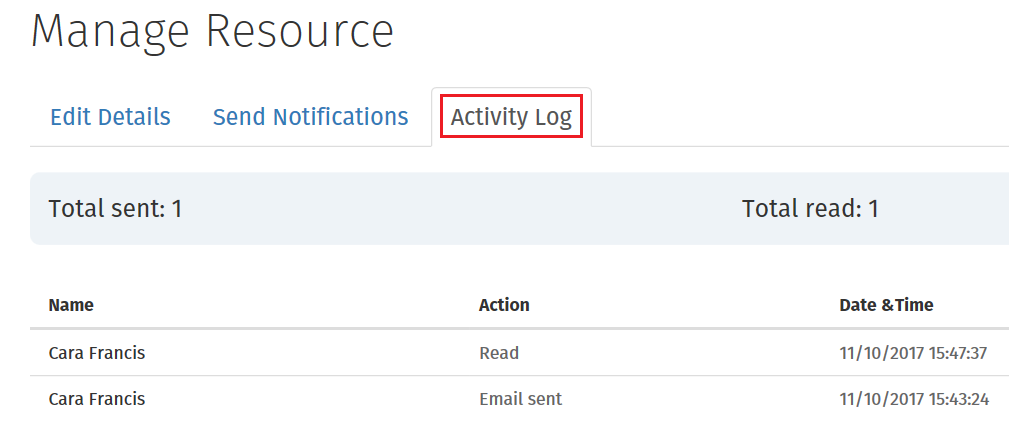
Activity Log
The activity log can be accessed at any time to determine emails sent and also to establish whether the resource has been accessed by the employee.

Need help? Support is available at 01 8352074 or brightpayirelandsupport@brightsg.com.


