To issue a P45 to an employee leaving your employment, simply go to ‘Employee’, select the employee’s name from the listing and click the P45 icon.

Before issuing a P45, it is important to ensure that all final payments have been made to the employee and all relevant payslips have been finalised, so that the correct year to date figures are included in the P45. Any non-finalised payslips will be removed once a leave date has been set.

Click 'Yes' to confirm that you have made all final payments to the employee.
P45 Details
1) Leave Date – enter the employee’s date of leaving. This is a mandatory field and you will not be able to issue a P45 without this.
2) Deceased – if the employee is deceased, tick the box provided.
3) PPS Number - if known, enter the employee's PPS number, if not already entered.
4) Address – enter the employee’s full address, if not already entered.
5) Date of Birth – enter the employee’s date of birth, if not already entered.
Click Continue. To commit the employee's leave date and issue the P45, click 'Yes' on the next screen.

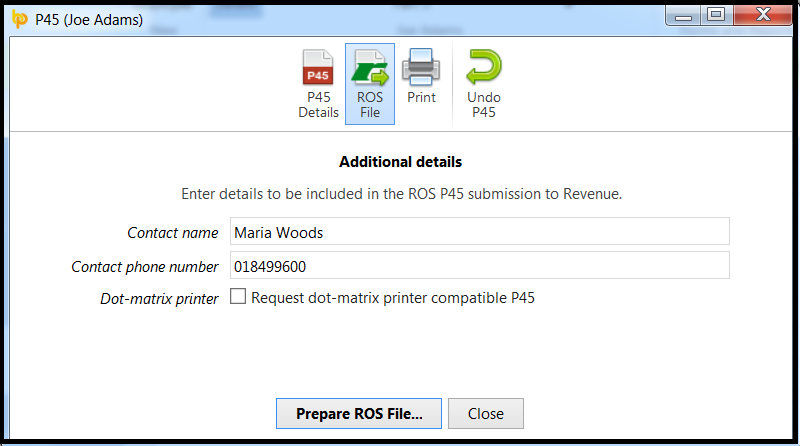
Preparing the ROS P45 File
After processing an employee's P45 in BrightPay, Part 1 of their P45 can be submitted through the Revenue Online Services website to inform Revenue that the employee has left your employment. This utility is only available if you have registered to use ROS.
To prepare the P45 ROS file in BrightPay for upload through ROS, simply:
1) Click ROS File on the menu toolbar.

2) Enter your Contact Name and Contact Phone Number, if desired.
3) Indicate whether your printer is a Dot-matrix printer.
4) Click Prepare ROS File and save to a location of your choice.

The P45 file is now ready for upload through your ROS utility. For assistance with this, click here
Need help? Support is available at 01 8352074 or [email protected].