Printing Payslips
Once a pay period has been finalised, the associated payslips will be available for printing.
- Simply click the ‘Print Payslips’ button on the menu bar within the 'Payroll' function.
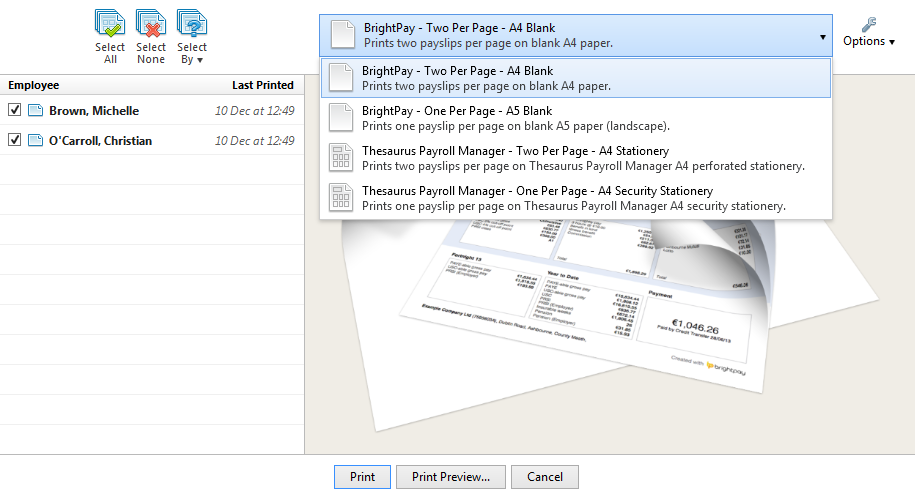
- On the left hand side select the employees for whom you wish to print payslips. Several options for selecting which payslips to print are available by clicking the ‘Select By’ button.
- Next, select your payslip design from the drop down menu.

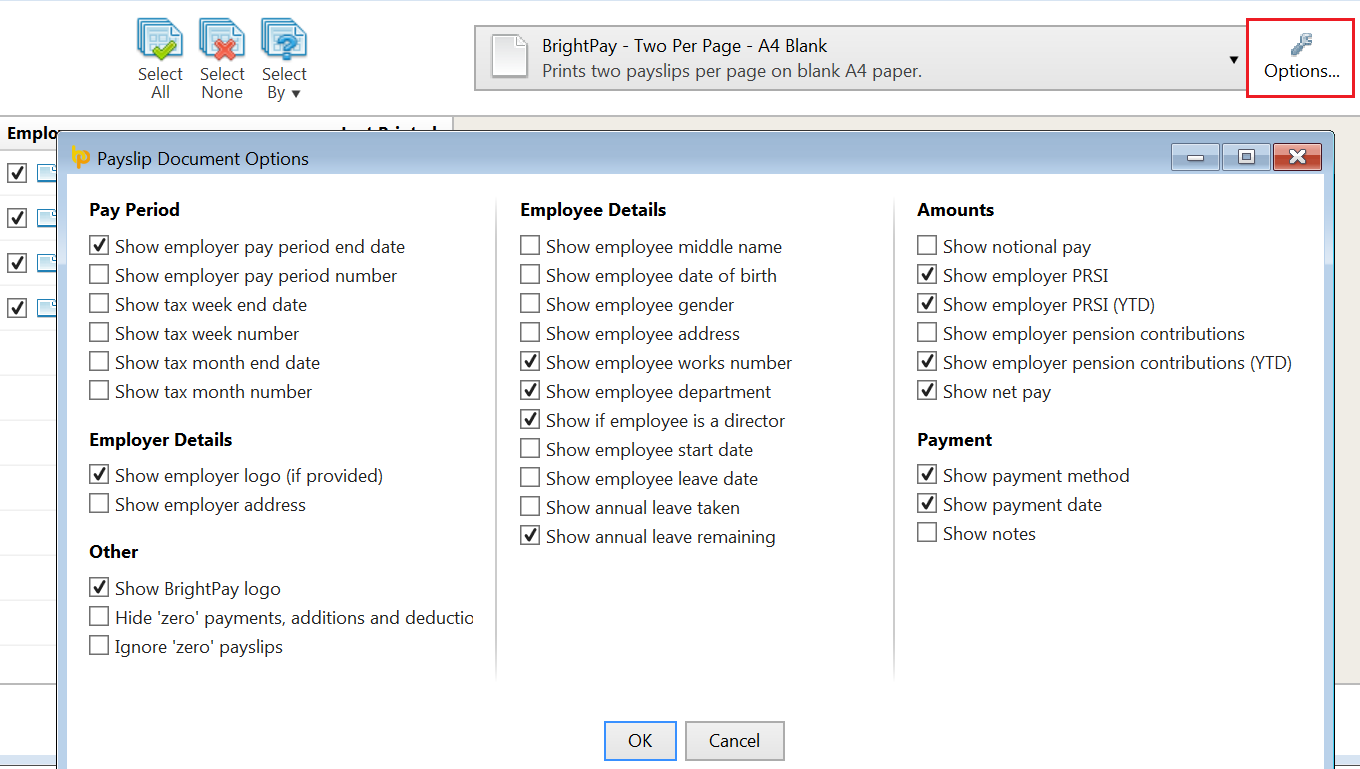
- To further customise your payslips before printing, click the ‘Options’ button on the right hand side. This facility allows you to add or remove certain information on the payslip, for example add a company logo or remove the payment method details.

- To preview the payslips before printing, simply select ‘Print Preview’. Then select ‘Print’ when ready.
Need help? Support is available at 01 8352074 or brightpayirelandsupport@brightsg.com.


