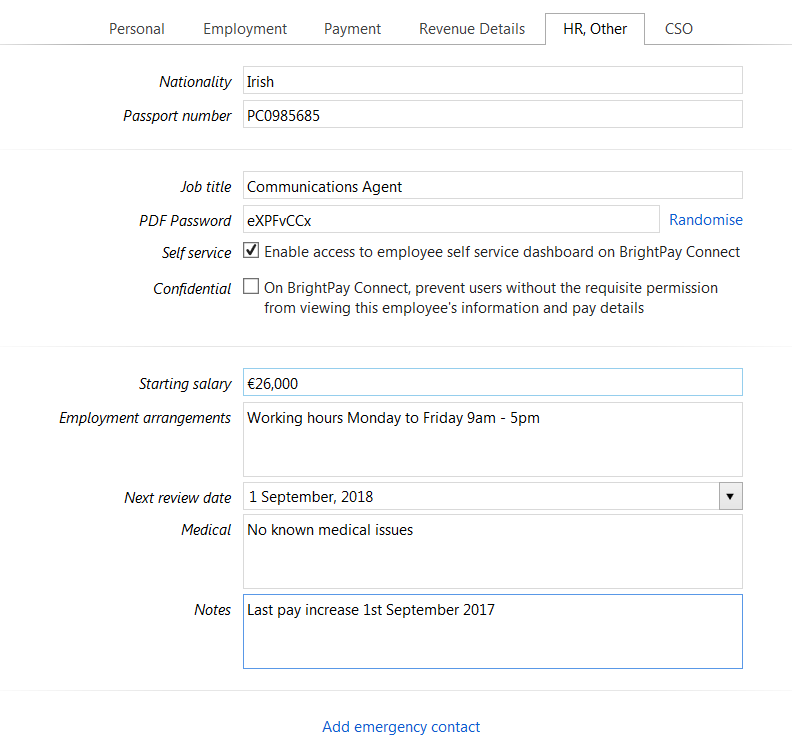
HR
To access this utility, go to Employees > Select Employee from listing > HR, Other. Complete the HR section as follows:
Nationality
Enter the employee's nationality, if known. This is an optional field.
Passport number
Enter the employee's passport number, if known. This is an optional field.
Job Title
Enter the employee’s job title, if applicable.
PDF Password
If the employee wishes to receive password protected payslips, enter the password that will be needed by the email recipient in order to open and view these attachments when received.
This password is usually set by the employee and can be a combination of letters and numbers. Alternatively. click Randomise to create a password for the employee.
Self Service
Applicable to BrightPay Connect subscribers only - tick this option if you would like to enable access for this employee to their self service dashboard on BrightPay Connect
Confidential
Applicable to BrightPay Connect subscribers only - tick this option if you would like to prevent users without the requisite permission from viewing this employee's information and pay details within BrightPay Connect
Starting Salary
Enter the employee’s starting salary, if known.
Employment Arrangements
If applicable, any employment arrangements made between the employer and employee can be entered here.
Next Review Date
Enter a review date as a reminder that a review is pending.
Medical
Enter any medical information relating to the employee, if known.
Notes
Enter any other notes of importance in this section.
Employee Photo
To add the employee’s photo to their record, double click on the photo icon and browse to where you have the photo saved. Please note, the image file must either be in .jpg, .png or .gif format.
Emergency Contact Details
Emergency contact details can also be added in this utility. Should more than one set of emergency contact details be added, an option will be given on each set of details to mark it as the primary emergency contact.

The employee’s HR details are now complete. Now select the ‘CSO’ tab to continue to set up the employee’s record.
Need help? Support is available at 01 8352074 or brightpayirelandsupport@brightsg.com.


