Here is a video tutorial on how to set up your Payment Schedule in BrightPay - Setting up your Payment Schedule
BrightPay allows Weekly, Fortnightly, 4-Weekly, Monthly, Quarterly and Yearly payroll to be run simultaneously, if required. BrightPay will allow multiple schedules for each individual pay frequency such as 3 monthly schedules, 4 weekly schedules, etc.
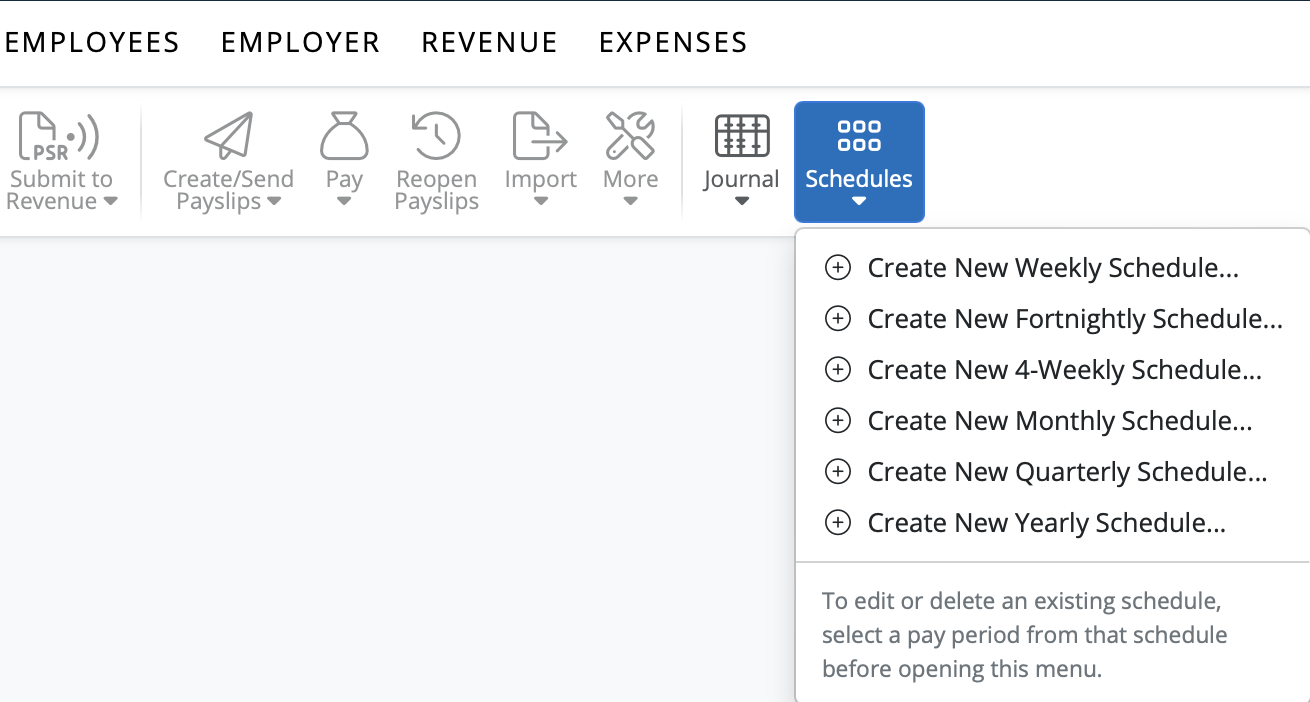
You can create a payment schedule under > Payroll > Schedules > Create New Weekly/Monthly/Fortnightly/4-weekly/Quarterly/Yearly Schedule.

After allocating a pay frequency to an employee within their employee record, BrightPay will recognise the pay frequencies that are required for the employer.
Before payroll can be processed within the Payroll utility, you must first set up the payroll schedules you require.

Please note: once a schedule has been set, this cannot be changed without re-defining (clearing down) your payroll data processed to date.
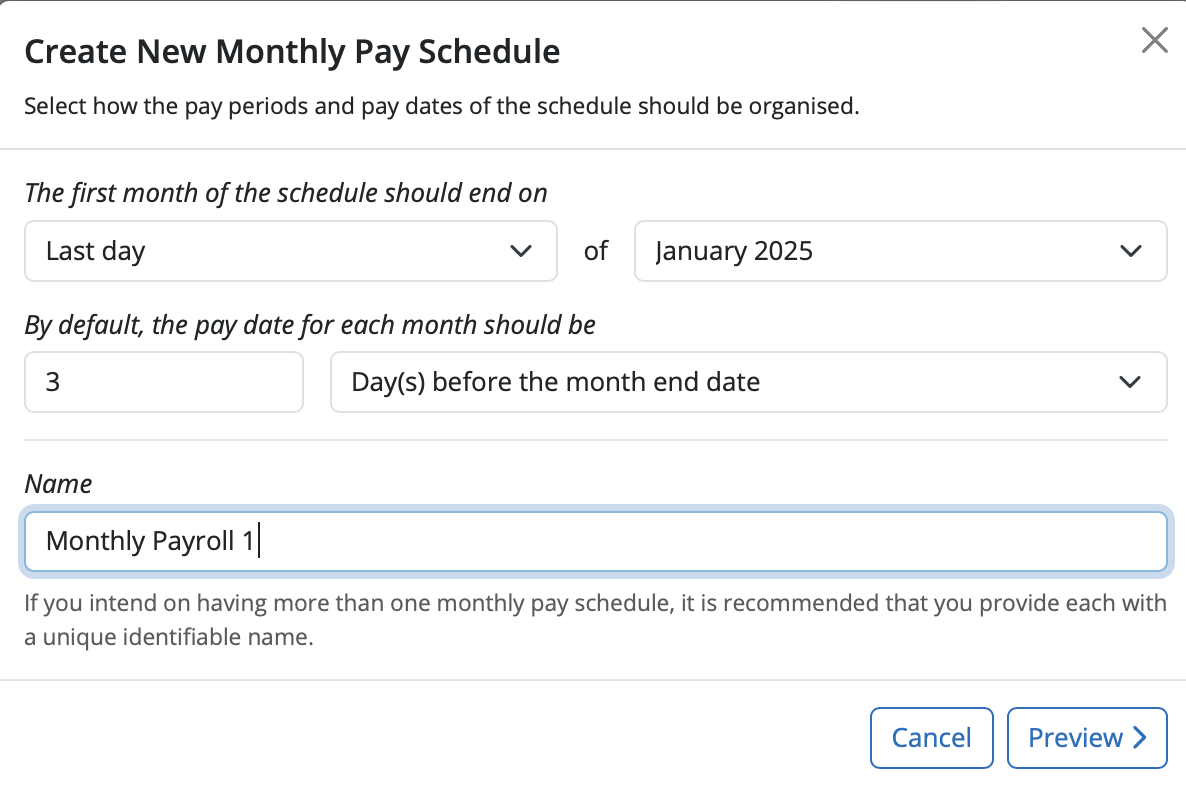
a) First, select the date when your first period of the schedule is to end on, followed by how your pay date is to operate.
b) You can name your pay schedule if you intend to have more than one schedule for this payment frequency.

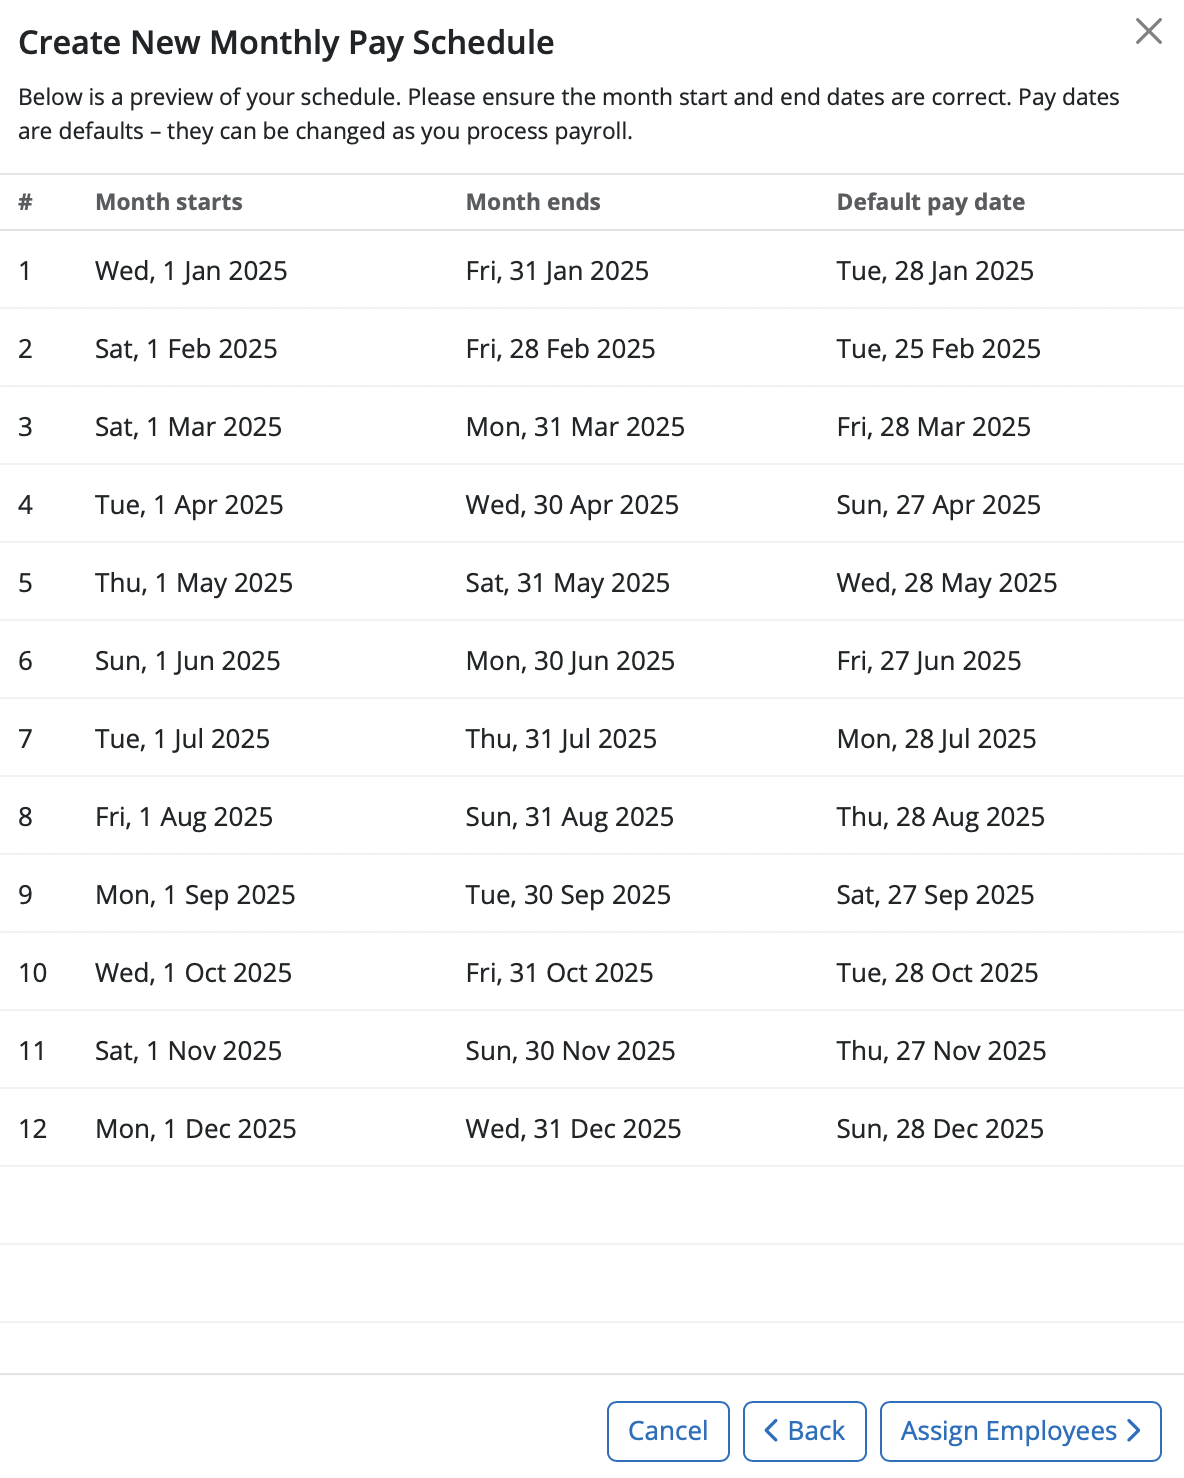
c) To preview your schedule of periods, simply click ‘Preview’. This is always recommended for you to check that you have the correct number of pay periods you require for the year.

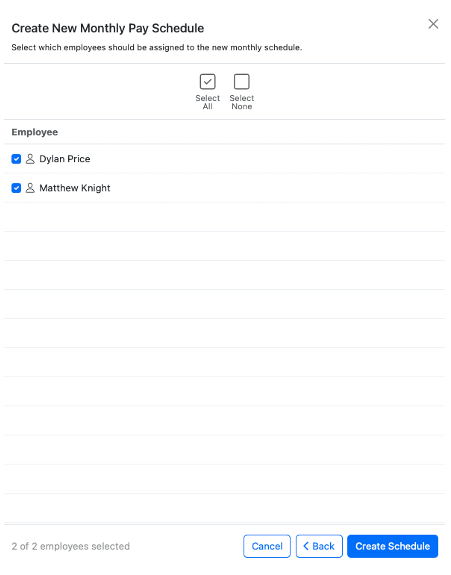
d) Click ‘Assign Employees’ when ready to assign employees to this new pay schedule.
e) Select the employees you wish to include in this pay schedule and select ‘Create Schedule’.

As employees are added to the payroll during the tax year, BrightPay will identify if a new payroll schedule is required and will prompt the user to set the schedule they require for the new pay frequency:

Need help? Support is available at 01 8352074 or [email protected].